

 Security guarantees
100% secure payments: PayPal, Visa, MasterCard, bank cards, alternative payments.
 Delivery policy
Deliveries by Mondial Relay or Colissimo (French fast postal service).
 Returns policy
Returns accepted up to 14 days after delivery
PUBLISHED: 2011
DESIGNER: John A. Foley
DEVELOPER: Kai Jensen
ADDITIONAL SCENARIO DESIGN: John Butterfield, Bryan Collars, Andy Maly, Mark Herman, and Volko Ruhnke
ART DIRECTOR: Rodger B. MacGowan
MAP ART: Leland Myrick & Chad Jensen
PRODUCERS: Rodger MacGowan, Mark Simonitch, Tony Curtis, Andy Lewis, Gene Billingsley
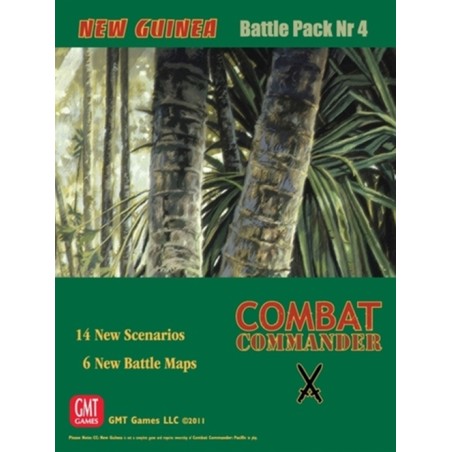
Rules relevant to the characteristic fighting in the coastal jungle versus the highlands are included as needed for each scenario, without the need of an additional rule booklet. A number of unusual, creative special scenario rules cover the unique situations represented, including Air Supply, Barge Landing, Canebreak and Coastal Jungle, Emplaced M3 Tanks, Joint Allied Operations including the Papuan Infantry Battalion, Patrol Dogs, Swamp Holes and Swamp Forest.
The new maps depict specific locations in New Guinea: the beachhead at the base of Mt Vulcan across from Rabaul, the village of Oivi, a high-mountain ridge overlooking Eora Creek, a strongpoint on the Soputa-Sanananda Road, the edge of the airstrip at Wau, and one of the crossings of the Driniumor River near the Afua Trail.
· M1 – “Rabaul Rousers” set at the base of Mt Vulcan on Simpson Bay across from the town of Rabaul, with a Japanese barge landing against Australian defenses at night, 23 January 1942;
· M2 – “The Gloomy Forest” set at the village of Oivi, with Australians and Papuans of Maroubra Force facing the rapidly moving Yokohama Advance Party, 26 July 1942;
· M3 – “Rebuked at Rabi”, set at Milne Bay, with an SNLF attack against Australian units, 3 September 1942;
· M4 – “Templeton’s Crossing” set at a heavily-contested crossing of Eora Creek high in the Stanleys, 17 October 1942;
· M5 – “Blind Man’s Bluff” set along one of the high ridges above the treacherous Eora Creek, with intermingled combatants, 28 October 1942;
· M6 – “Breakout” set at Gorari after the fall of Kokoda to the Australians, with a desperate banzai action, 11 November 1942;
· M7 – “The Butcher’s Bill” set on the Soputa-Sanananda Road, with US forces entering the conflict in horrific swamp forest, 10 December 1942;
· M8 – “Closing Outer Camp” set at Buna station, with Australian units using M3 tanks to eradicate the defenders, 18 December 1942;
· M9 – “Wau Me Worry” set at the Wau air strip (with active landing operations during the action), with Australian defenders facing a desperate attack, 31 January 1943;
· M10 – “Bulolo River Bridge” set outside the outpost at Wau, with patrols of both sides (including Japanese Patrol Dogs) attempting to use the same bridge at cross-purposes, 30 January 1943;
· M11 – “Shattered Bobdubi” set during the advance upon Salamua, with Australian units driving upon a Japanese base camp set in the kunai-covered heights of the interior, 30 June 1943;
· M12 – “Scarlet Beach” set at the mouth of the Song River near Finschhafen, with a Japanese barge landing at night against combined Australian and US defenders, 17 October 1943;
· M13 – “Bad Dreams” set on the Driniumor River, featuring the heroic stand of an unknown US BAR operator facing a hastily prepared Japanese night charge, 10 July 1944; and
· M14 – “Encirclement of Troop C” set on the Driniumor River, featuring a Troop of US Cavalry trying to stave off being surrounded by Japanese units that had surprised them by walking casually into their positions, 21 July 1944.
Game Features
|